Jun
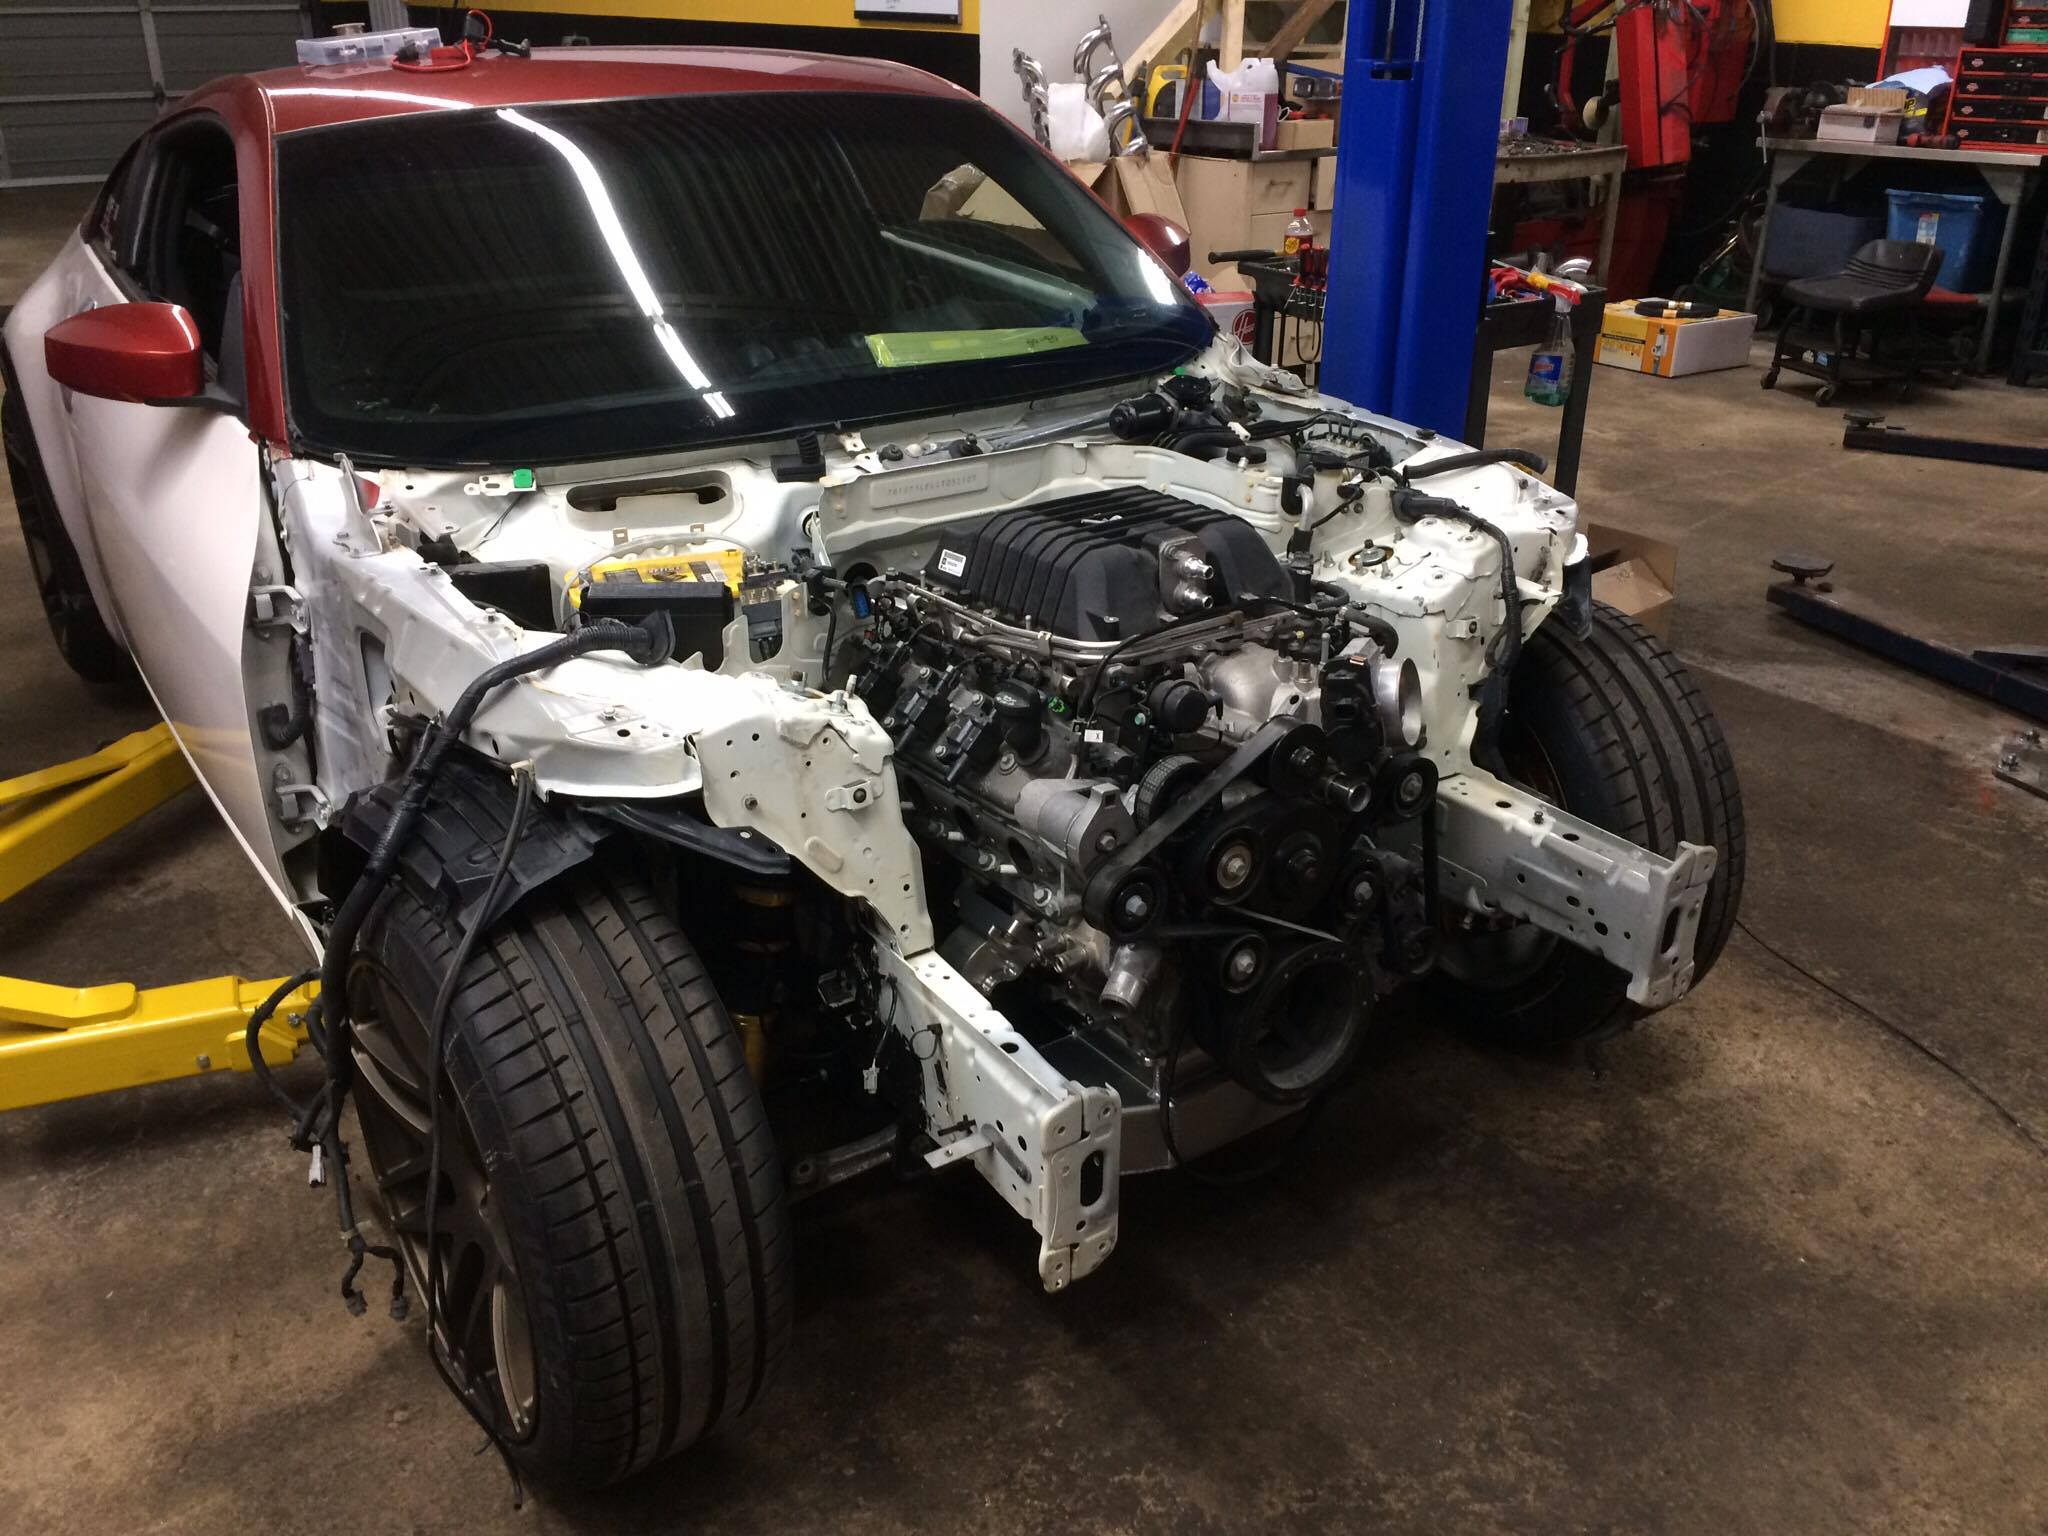
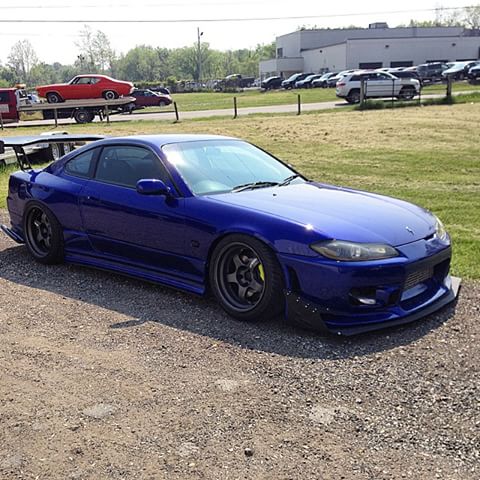
This particular 350z came to us through a craigslist transaction involving a 4-wheeler. It started it’s life with us in rough shape, blown lower control arm bushings, the most bondo I think anyone of us have ever seen piled onto a single quarter panel (this is seriously ⅜ of an inch thick, maybe more), ruined interior, and burning enough oil to turn the rear bumper a nice shade of sut. We started by completely stripping the car’s interior and exterior panels, then removed the poor VQ35 from it’s home.
At this point we split up to conquer several tasks simultaneously. Finding wheels and a body kit to suit the car and our goals, sourcing a new powerplant and transmission, and sourcing all of the parts to make the swap happen.
We ended up with Work Meister M1 in 19×11.5 -36 and -44 F and R respectively, rocket bunny v1 wide-body kit and an LSA from a 2014 ZL1 Camaro.
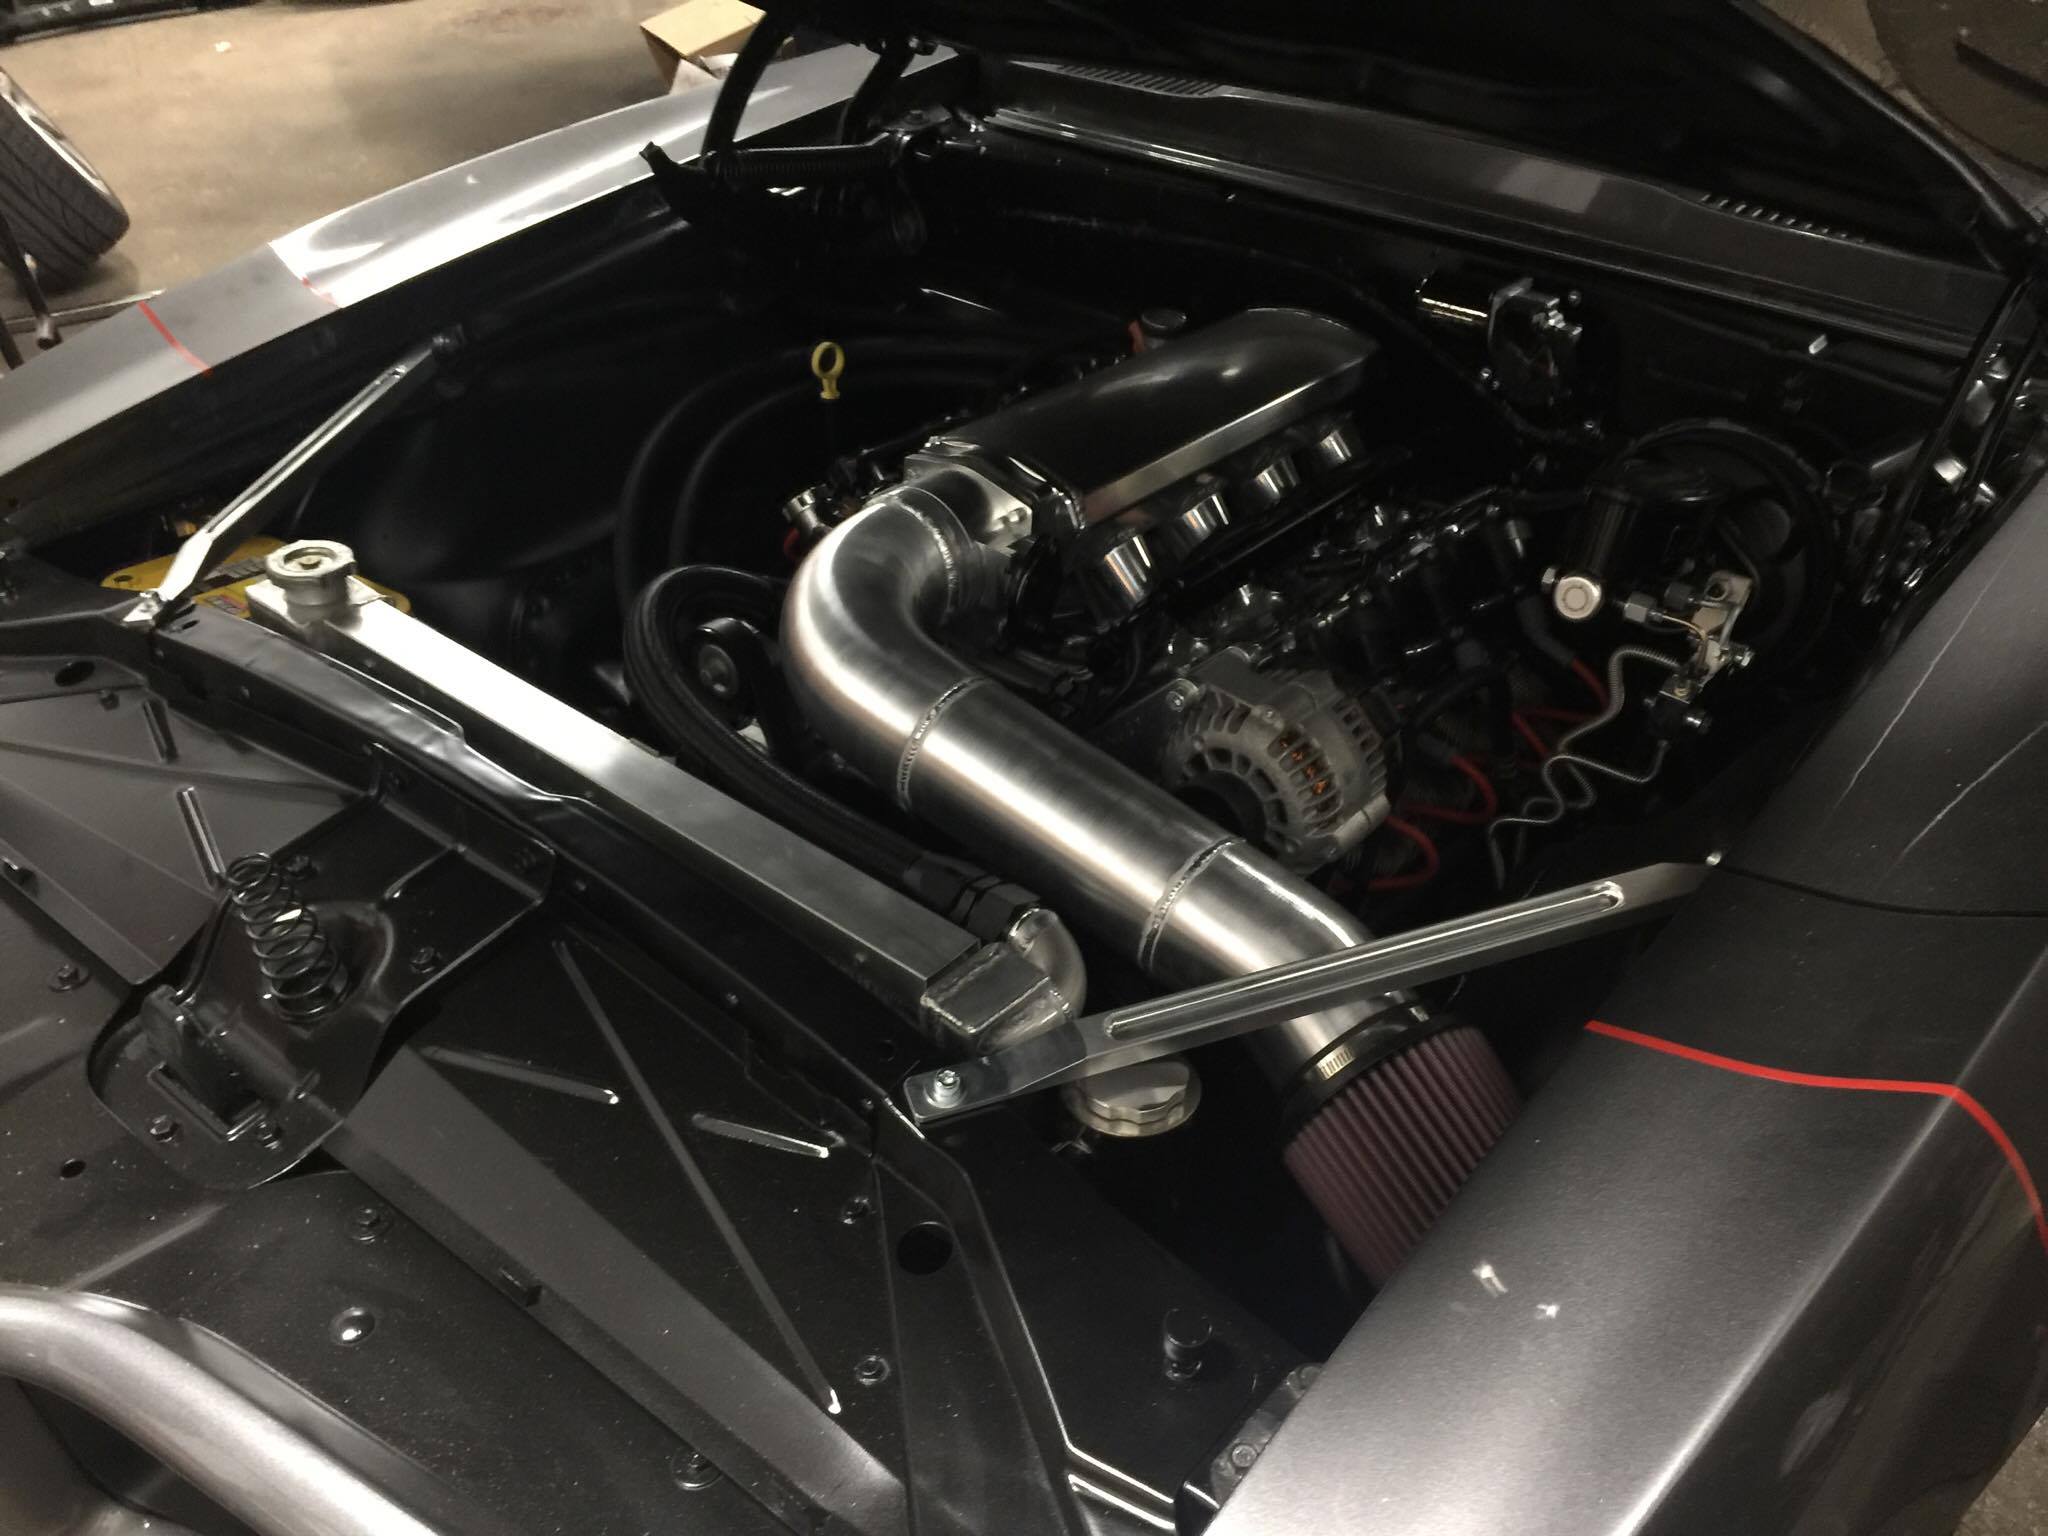
For the interior we sourced the majority of the parts from an 06 350z, and made custom brackets to place a set of r35 GTR black edition seats into the vehicle. We also ordered a Sikky LS 350z swap kit to make the build progress at a faster rate. We ended up modifying the front subframe to move the LSA farther back into it’s new home and began the rest of the modifications. As this swap kit is not meant for a tr6060 transmission we custom built a cross member and were able to move the engine back far enough that a shifter relocation was not needed (as the tr6060 has one from the factory.) We also had some difficulties with the intake as it’s offset to the drivers side, making fitment difficult with the core support. We chose to move the radiator under the core support and use tight radius aluminum bends to make the intake work. It has an upward angle to it and we like it, so we decided to not continue fabricating something to make it more “standard LS swap.)
We installed TruHart air suspension front and rear with the programmable adjustable heights and cut the rear quarterpanels to allow for the rocketbunny kit to fit into place. As per the bosses request we made metal rear mini over fenders to fit inside of the kit so that it was water tight up against the bottom inside of the widebody rear over fenders.
With the engine fitted where we wanted it, it was time to start the engine modifications. The LS received a new cam and the valve springs / pushrods to support it. The cam itself is a custom grind by Jeff Lowry at Performance Specialties Inc specifically for the supercharged application.
While the engine was receiving its new cam, our other technician taped off and painted the engine bay a gloss black. We also added gold heat reflective tape to make the black paint really pop and keep the engine compartment heat separate from the passenger cabin. At this point we were ready for the final installation of the engine and to move onto the fuel system.
The original idea was to use the Sikky fuel line solution, but as it uses -6 an line it wouldn’t support our horsepower goals for this car. We ended up creating a return system out of the stock fuel pump housing. -8 an to the adjustable regulator and to the fuel rail, -6 return back from the engine bay to the tank. The pump is an in-tank walboro 450 and should be plenty to get us into the 700rwhp range.
The wiring was an interesting challenge as we decided to convert the LSA over to drive by cable. This meant reverting a lot of the sensors and the computer itself to an older style 99-02 camaro engine computer. With the help of a lingenfelter converter box for the reluctor wheel and a standalone LS1 harness converted to work for the 350z, we were finally on the downswing of the swap and moved onto the cooling aspect of the build
As I previously mentioned the intake prevented us from keeping the radiator in its factory location. We ended up using a radiator kit that allowed us to pick the core size and then weld the fittings on where they made the most sense for the hoses.
Jun
This Firebird came into the shop to have the odds and ends finished up on the ls6 swap, and to clean up the engine bay and underside of the car. From garage swap to clean install was the owner’s goal.
We tried something new with the intake that we haven’t seen before, and actually welded the intake pipe to the throttle body itself. This results in a coupler free intake that is both clean and strong.
Other touch ups included tucking the harness, adding an lines to the water pump and radiator, and painting the engine bay.
If you have a swap or know someone with one and they have any issues or just want the last 10% finishing work done, let us know and we can take care of the rest of it for you!
Jun
This is TJ’s personal car, and it can sometimes be found at the shop when he’s not driving his Yaris for gas mileage reasons. It’s been built over a period of about 4 years, transformed from a completely factory 240sx, to an LS swapped drift car that does a few track events a year.
Here’s a short list of some of the parts on the vehicle.
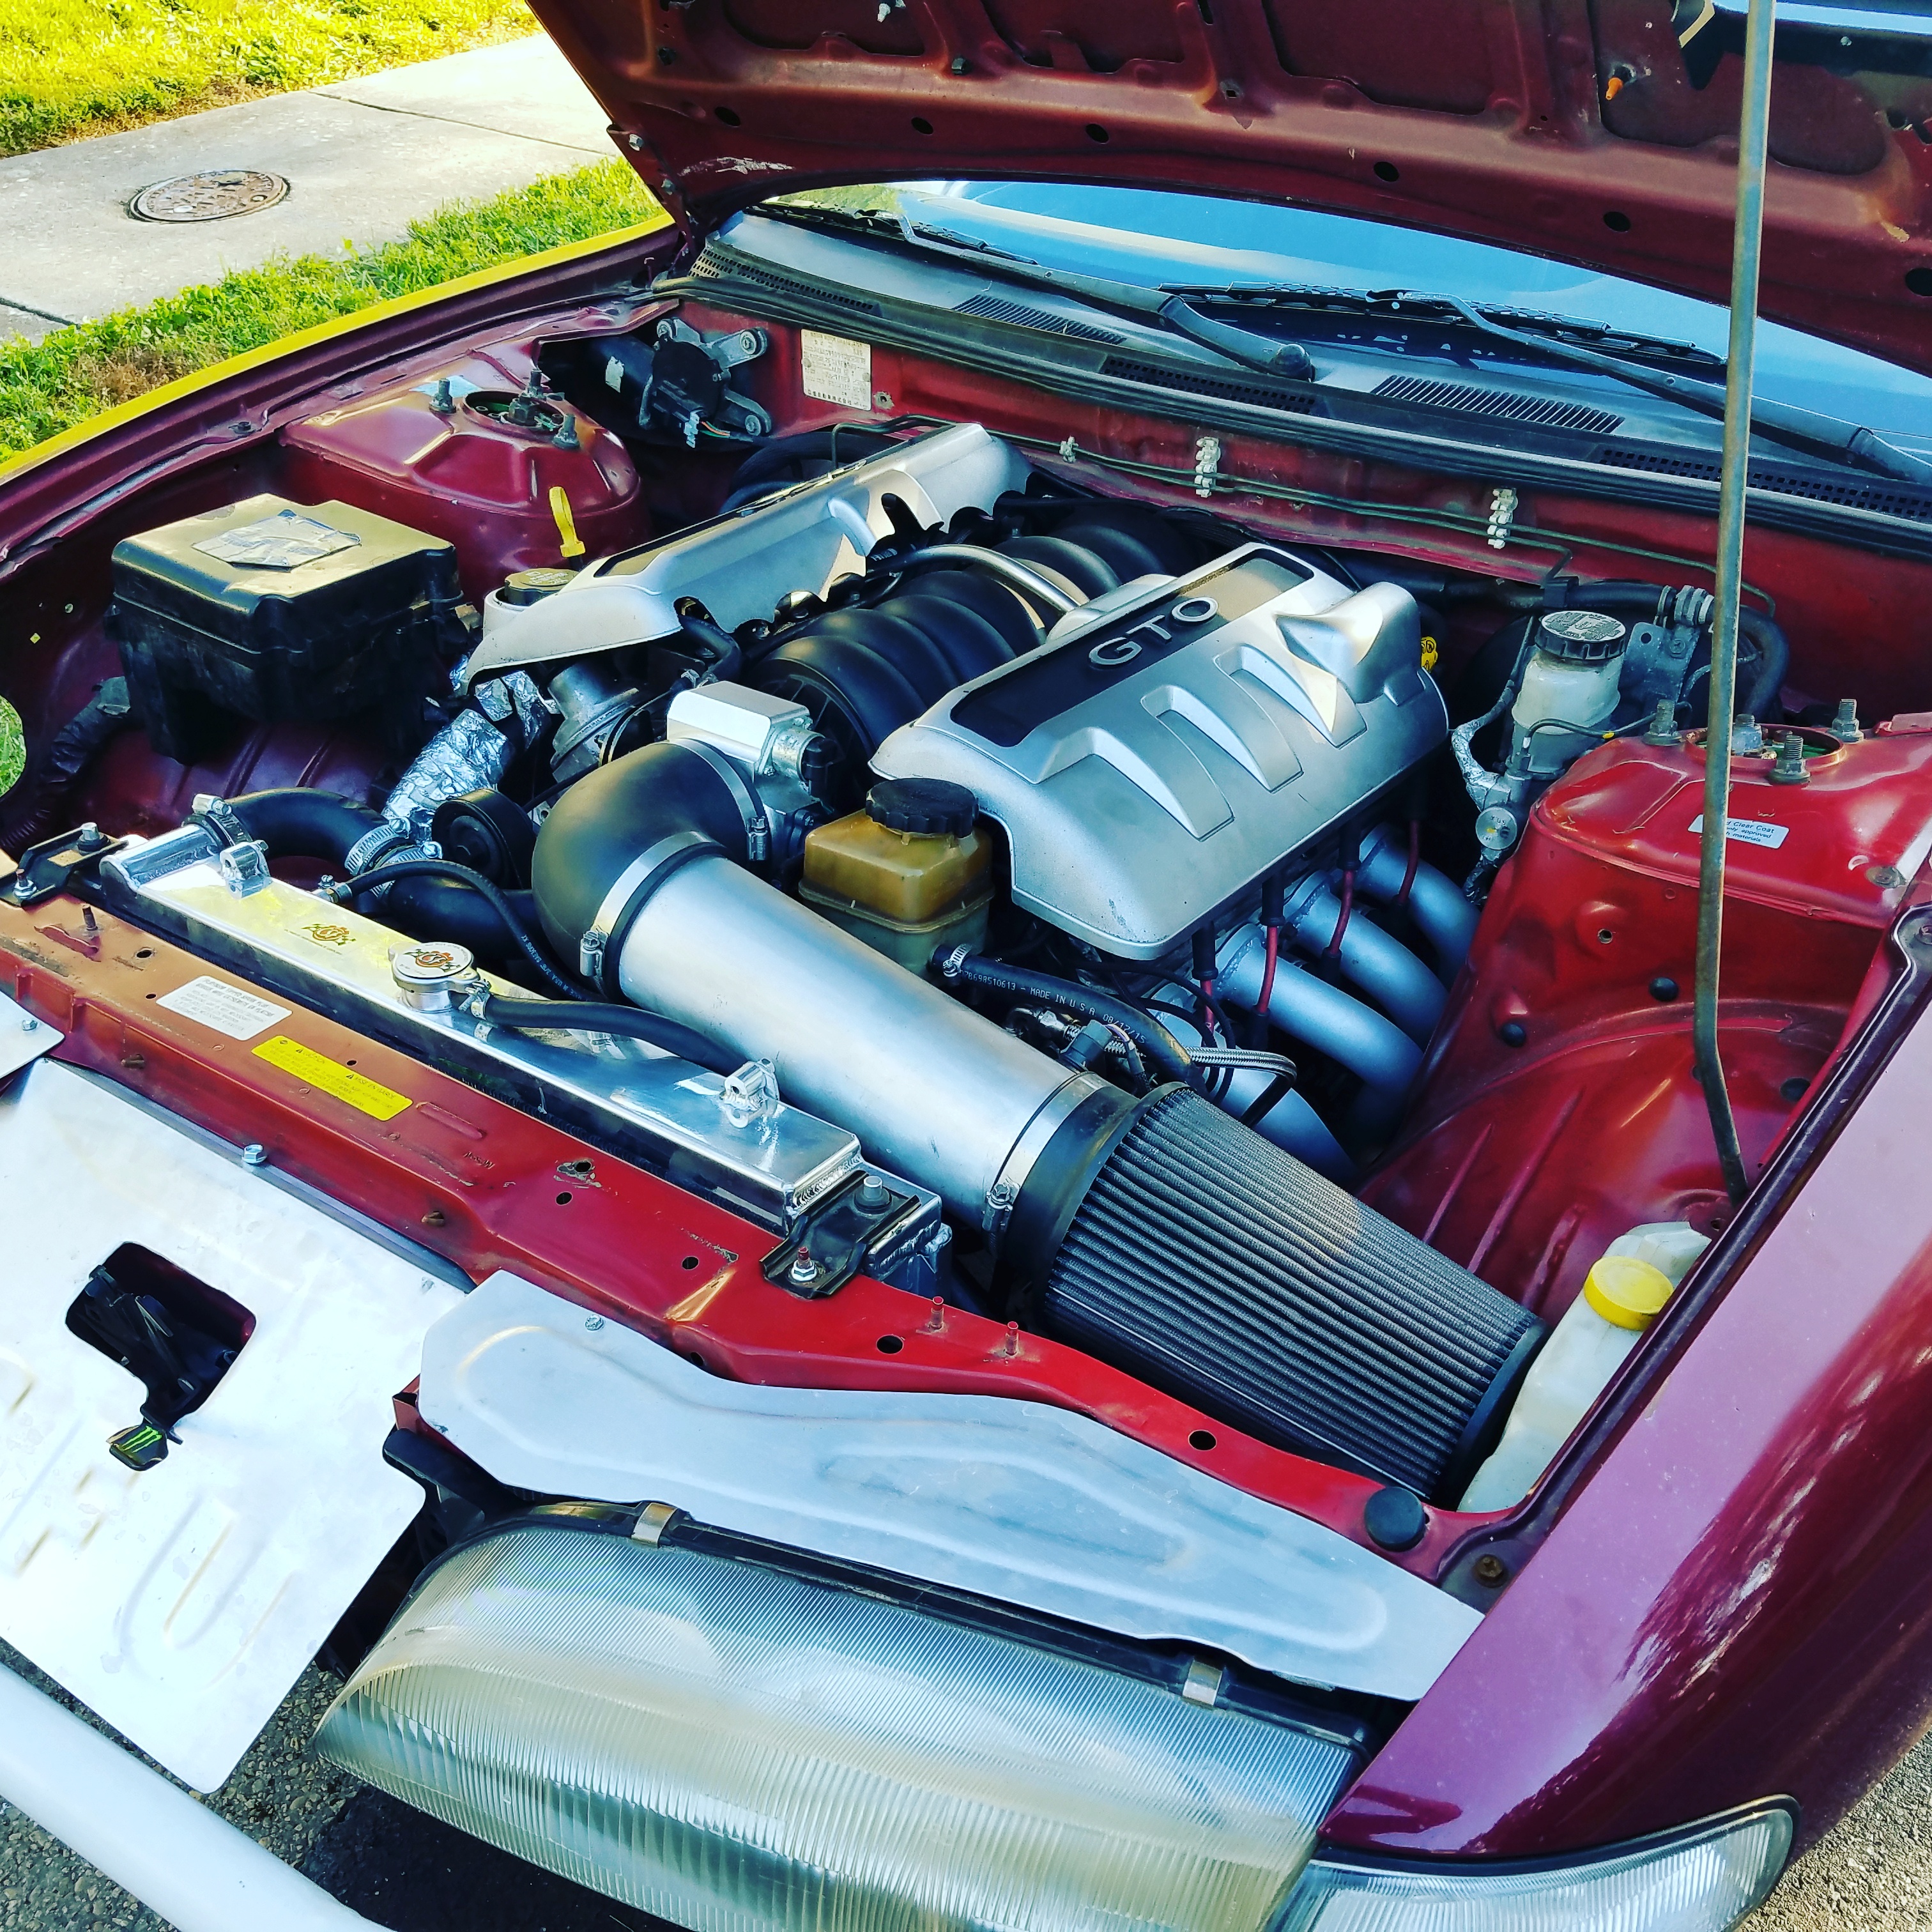
S14 with a 6.0L and T56 from a 2005 GTO
Big NA cam with valve springs and pushrods to support it – making ~450wrhp
Installed with Daft innovations swap kit – recently ceramic coated and wrapped headers
Custom aluminum cooling duct plates
CSF radiator
Fortune Auto 500 coil overs
ABC exclusive wheels – 18×9.5 +12 F 18×11 +7 R
BN Type 4 body kit
GKtech dual caliper hydraulic ebrake kit with Sikky handle
Fully adjustable suspension
and so on…
Stop by the shop and check it out!
Jun
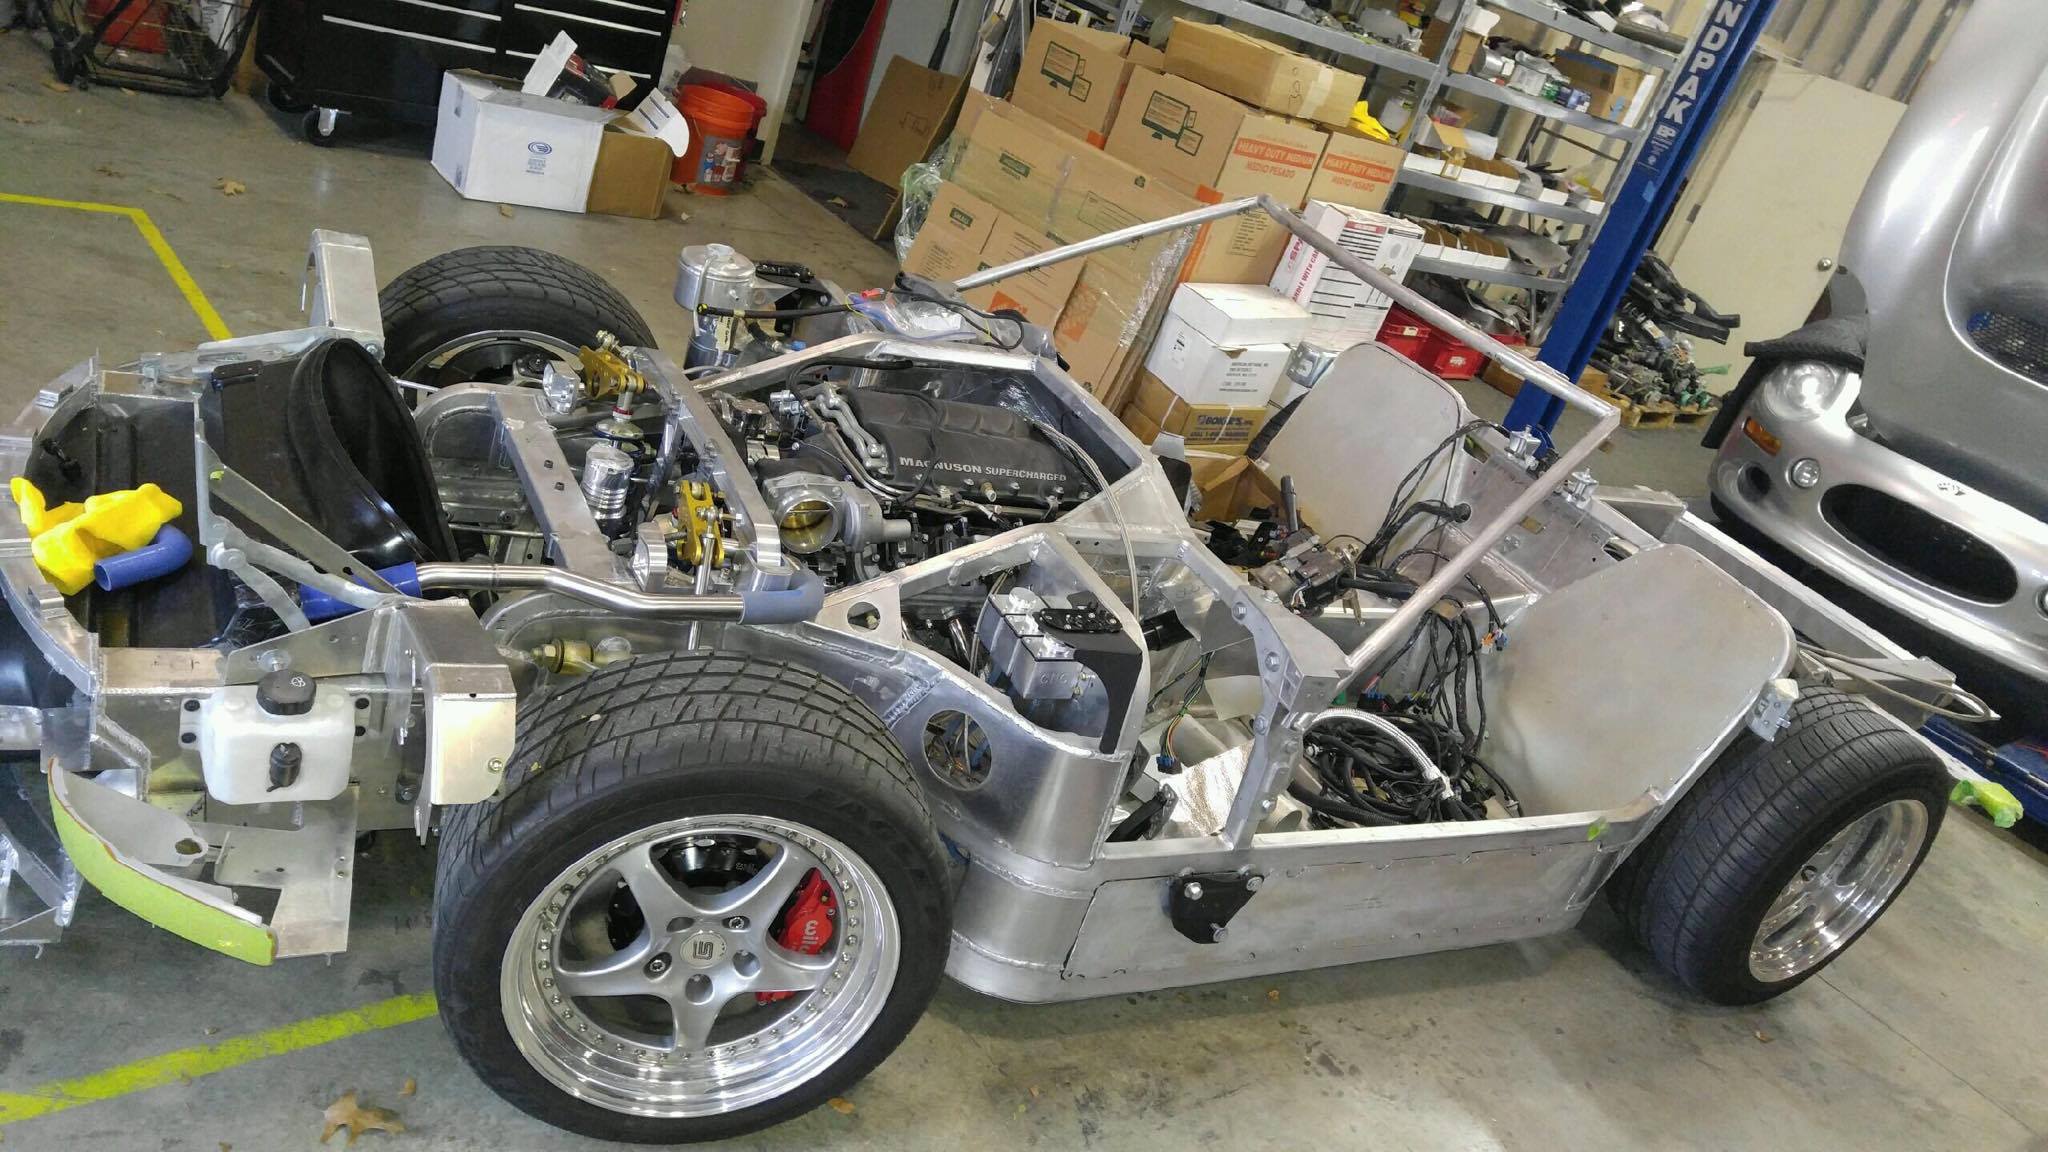
This is a car you don’t see everyday! This Shelby series 2 is being built by hand by another shop and they decided to throw an LS3 in it, complete with a blower from Magnuson. As they are accustomed to working with carbureted engines and not EFI systems, they reached out for a bit of help with the wiring and the fuel system.
These are production / show quality vehicles and like the LSA 350z, are expected to see some serious track use in the future. As such, this LS3 also received a mechanical throttle body and everything needed to convert it.
I’ve attached some photos of the car just because it’s fascinating. To be fair to them I just want to remind you that we were only responsible for the engine wiring.
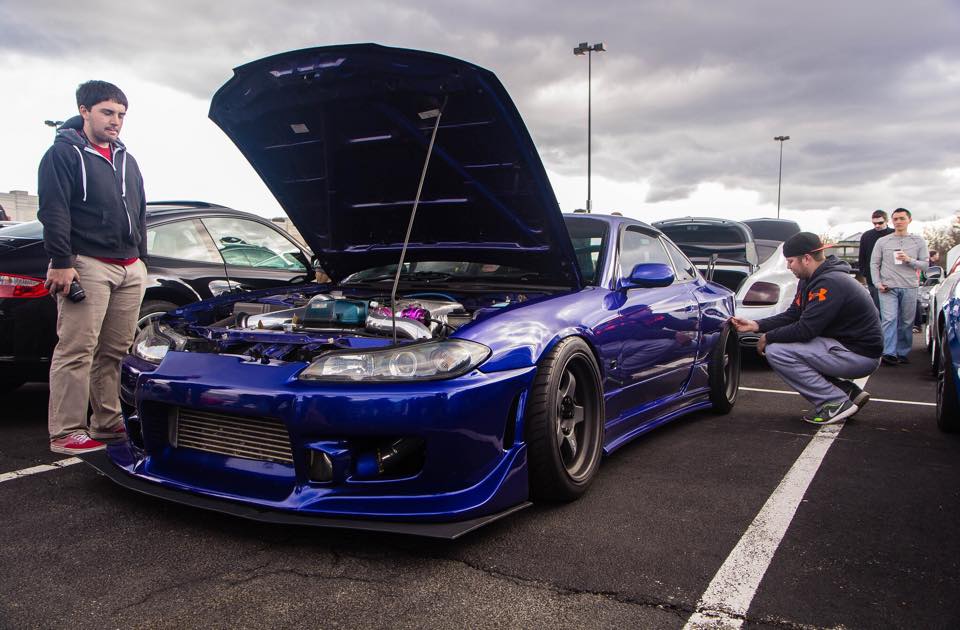
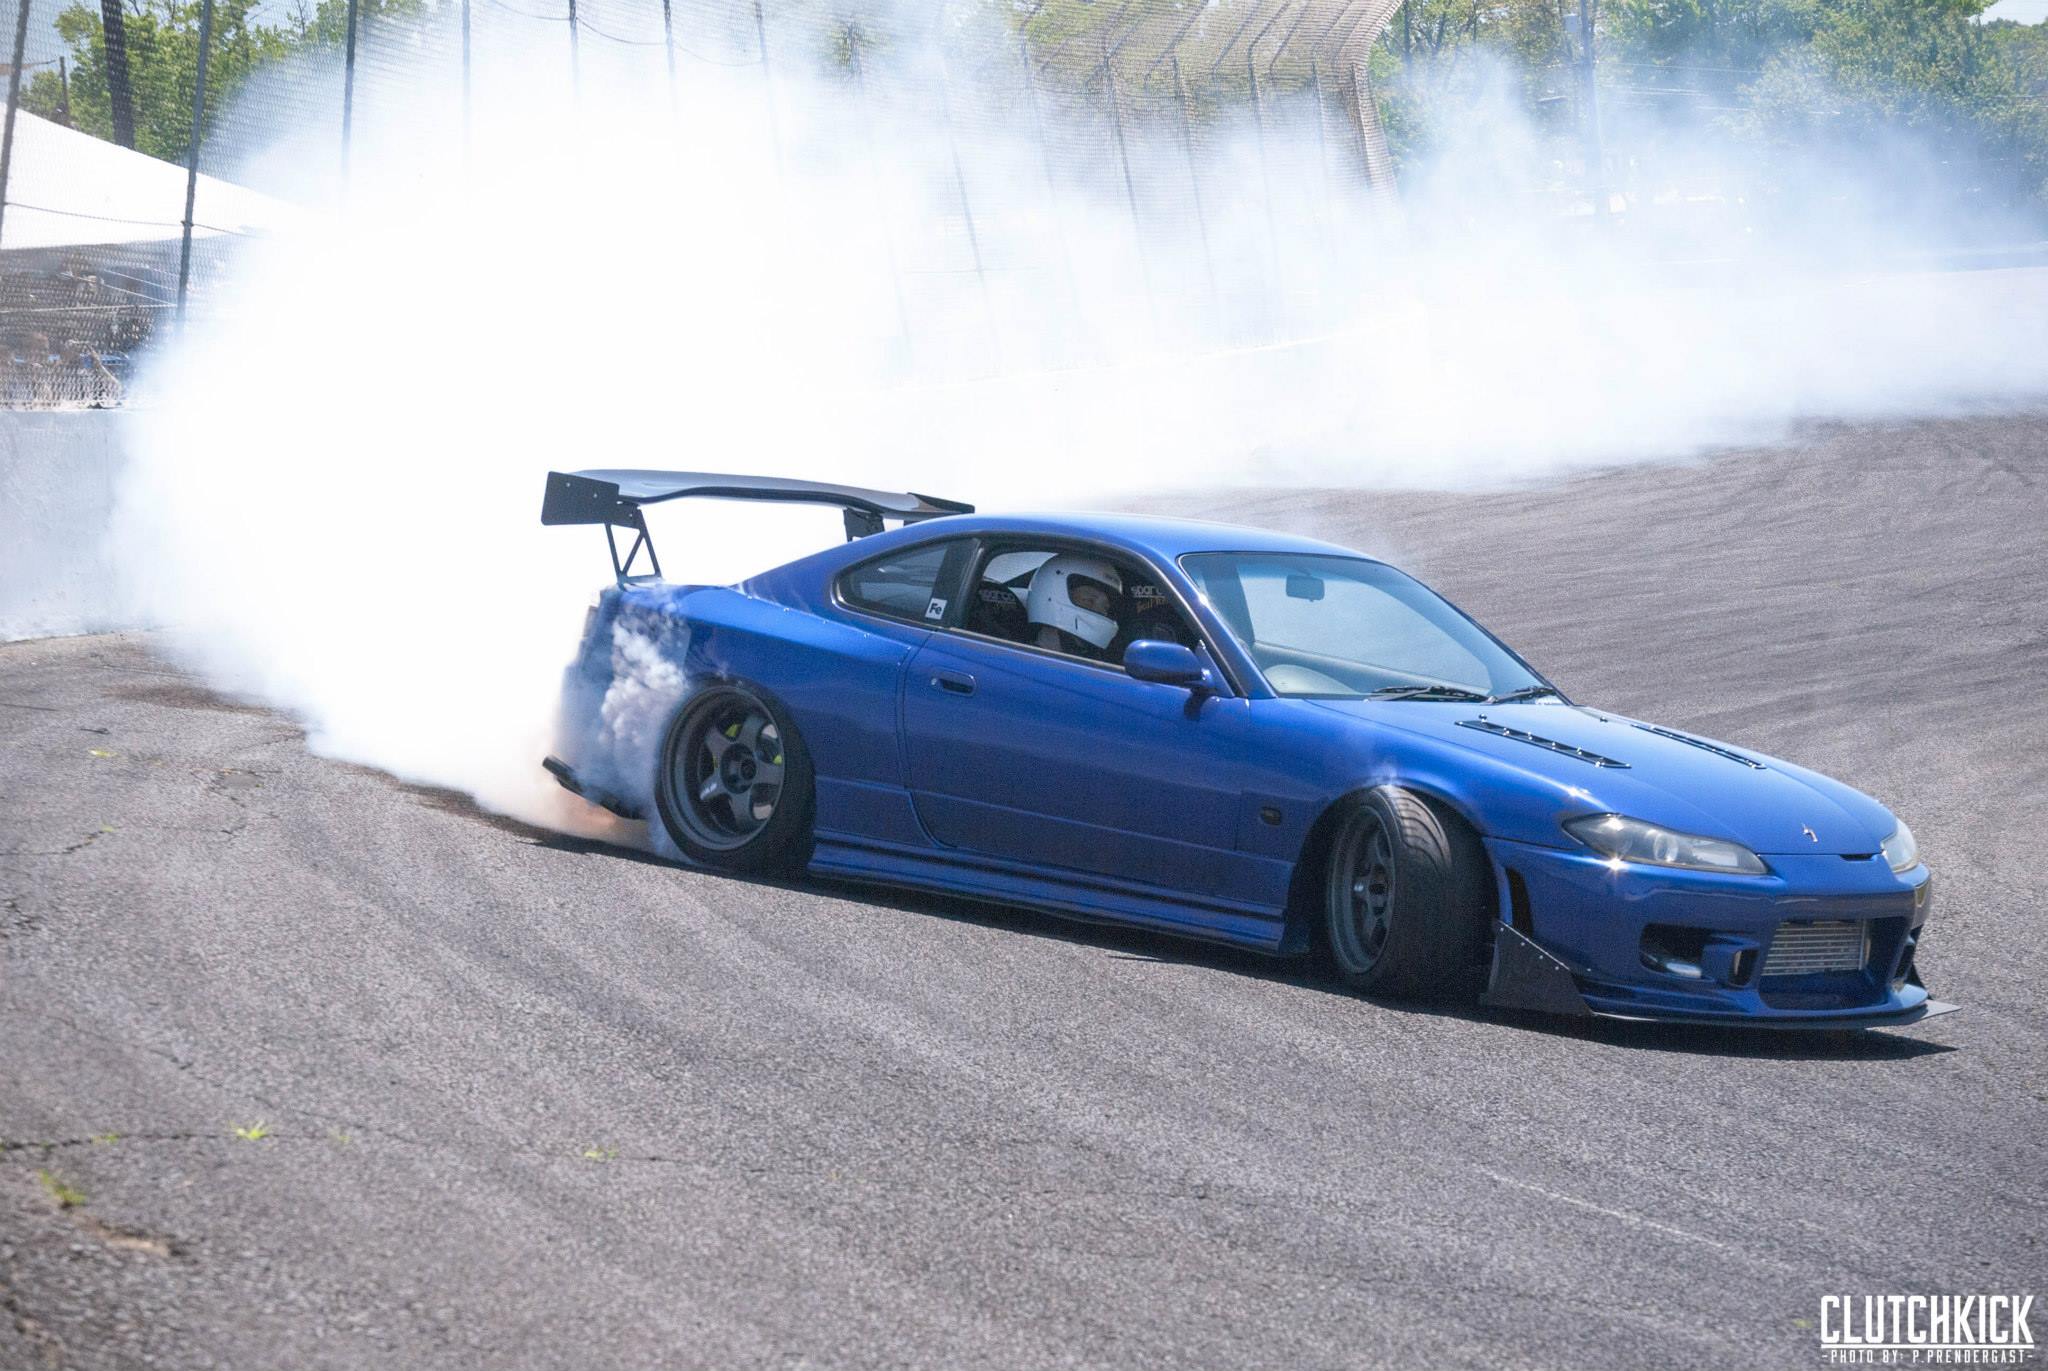
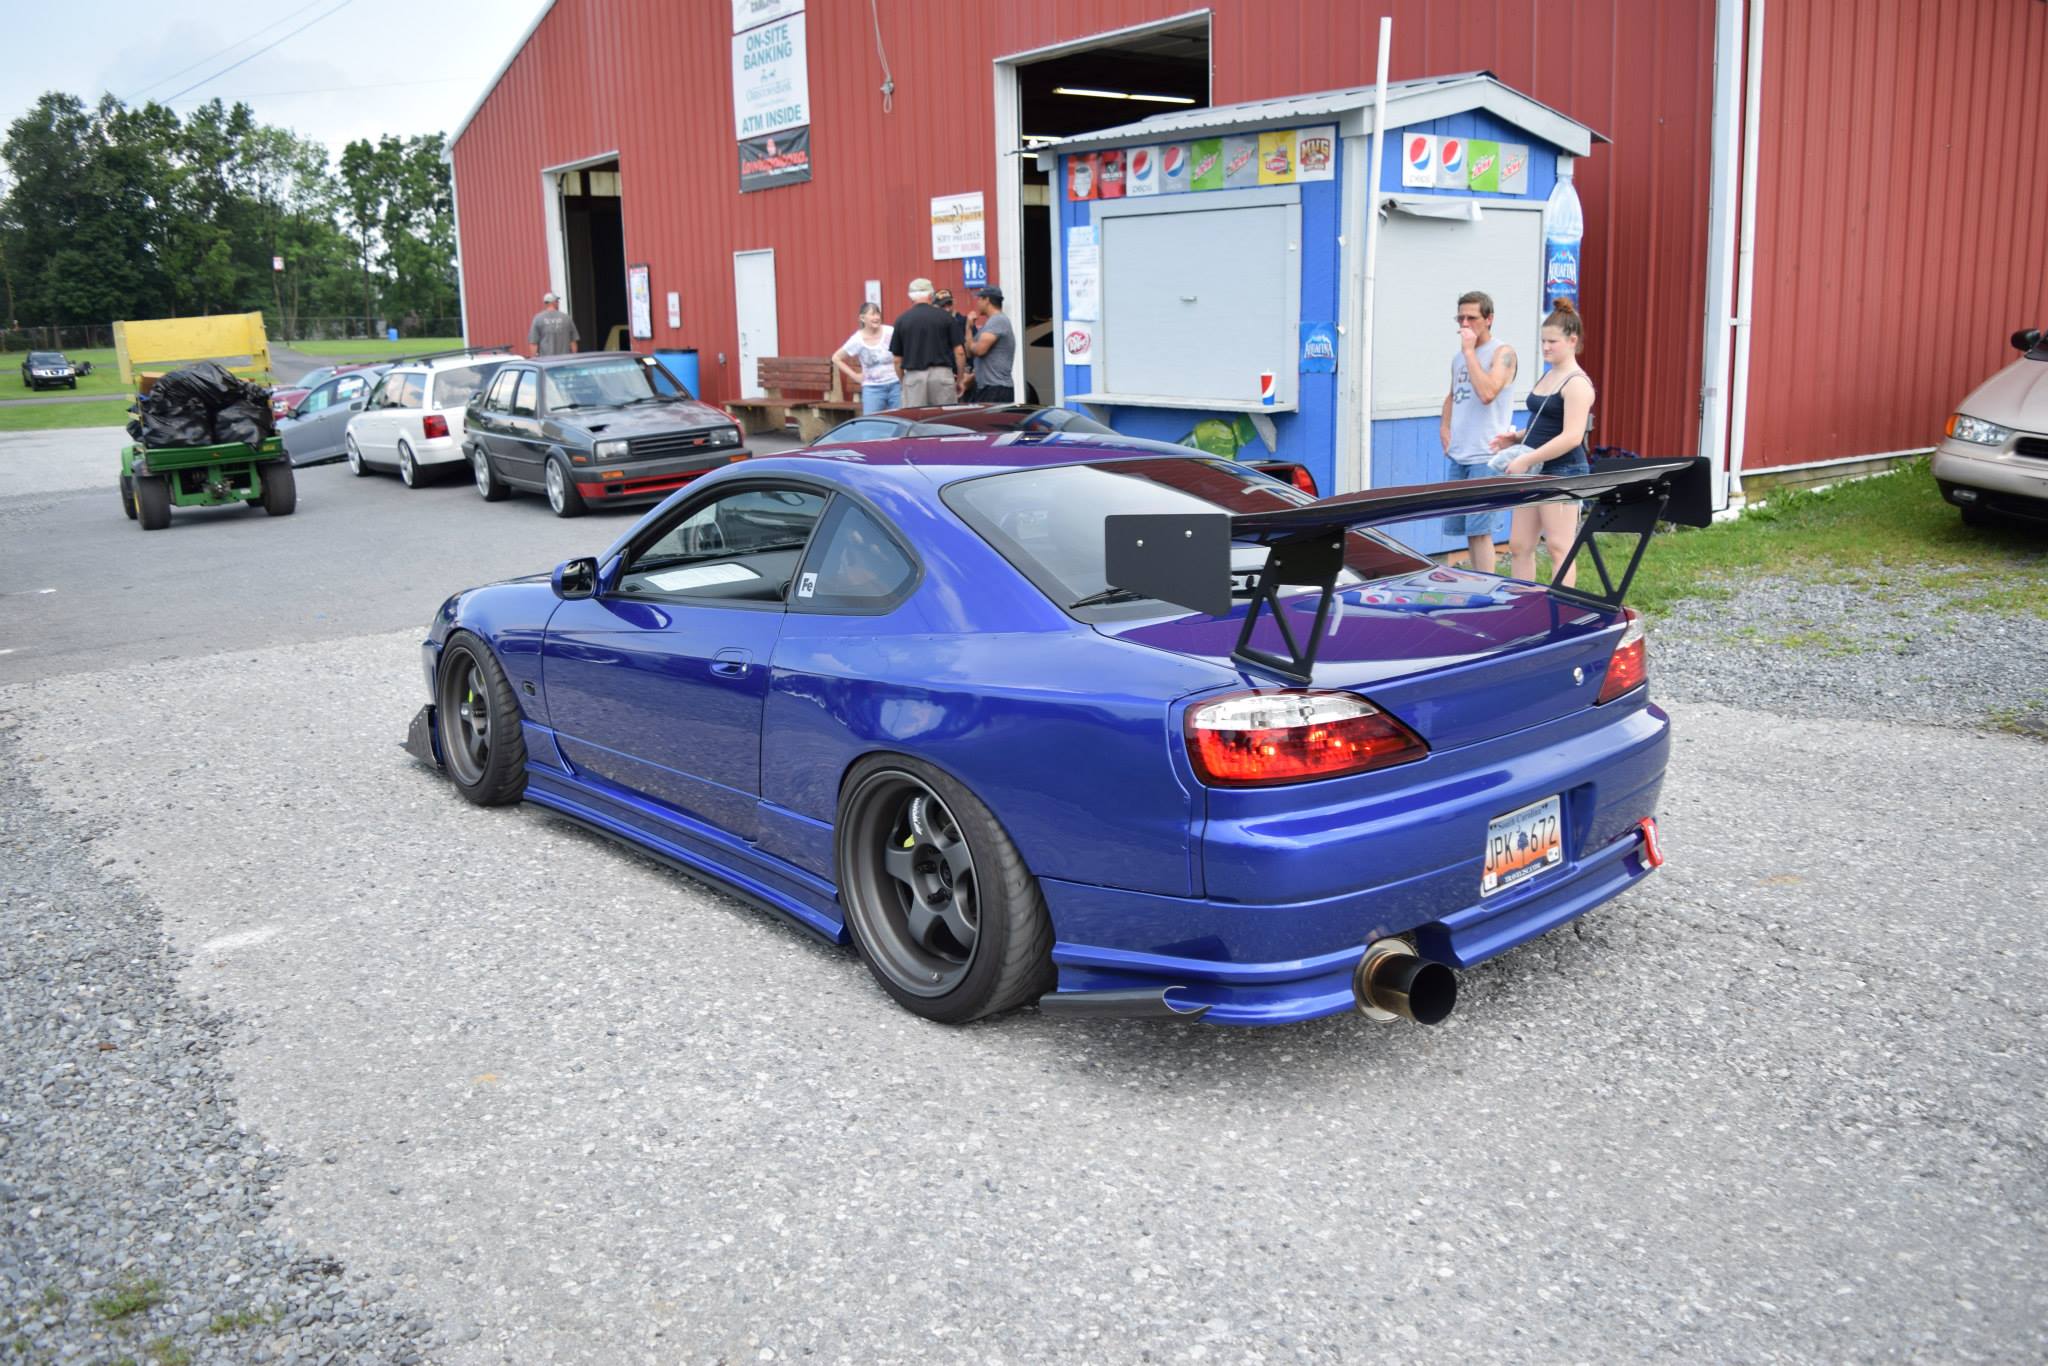
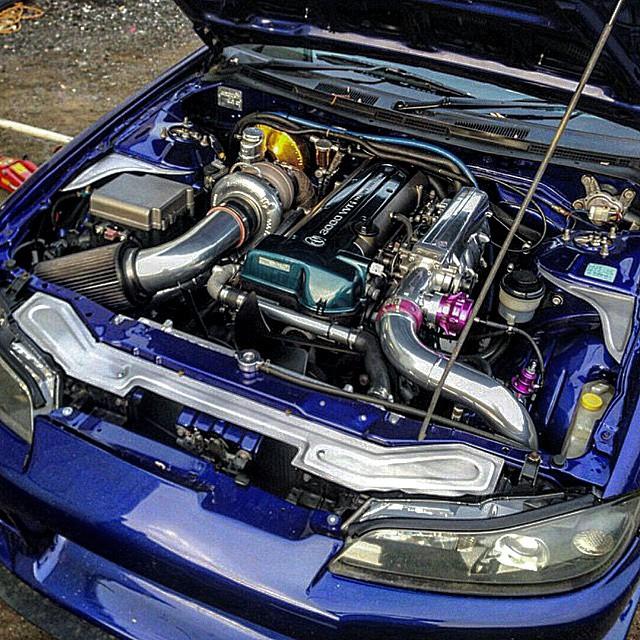
Jun
Kiely built this magazine quality car to prove that you don’t need a monster budget to have both excellent performance and good looking car. With careful part selection and time he was able to put together this S15 and make decent power numbers without breaking the bank.
Here’s a simple list of some of the modifications done to the car:
JDM VVTI 2JZ swap from an aristo
18in Work Meister s1 wheels
BC racing coilovers
Borg s366 turbo
AEM V2
Dual rear brake calipers – for a dedicated and independent hydraulic handbrake
Rear over fenders
and countless detail and performance upgrades throughout the rest of the chassis.
The car made a bit over 600 wheel horsepower all said and done.
More detail will be added to this post in the future.